


How to Make Bone Broth: The Ultimate Guide
Introduction
How to Make Bone Broth
Master the art of extracting maximum collagen for ultimate joint and gut health.

What Is Bone Broth?
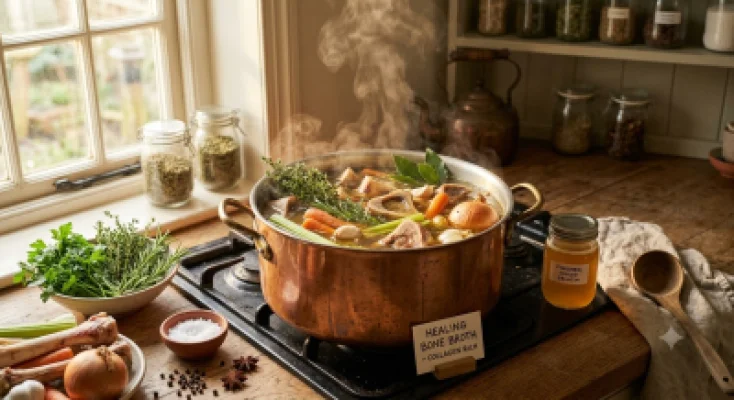
Bone broth is a deeply nutrient-dense liquid made by slowly simmering animal bones and connective tissue for an extended period, typically ranging from 12 to 24 hours. Unlike regular stock, which is simmered for a much shorter time, bone broth is specifically designed to extract maximum collagen, gelatin, essential amino acids, and vital minerals. This prolonged, slow-cooking process gently breaks down the tough connective tissues, releasing powerful compounds that are highly beneficial for joint health, gut lining repair, and overall immune system support. Mastering this foundational technique transforms simple, high-quality bones into a powerful, restorative elixir that forms the rich, savory foundation of countless nourishing recipes and daily wellness routines. It is the ultimate way to honor the whole animal while boosting your health.
Mastering bone broth preparation ensures you extract the maximum nutritional benefits, particularly collagen and gelatin, which are crucial for maintaining healthy joints and a strong gut lining. It also allows you to strictly control the quality of ingredients, completely avoiding the high sodium and artificial preservatives frequently found in store-bought versions. By learning this technique, you can significantly elevate the depth of flavor and nutritional profile of your everyday soups, stews, and sauces, making every single meal a deliberate step towards better, long-term health and vitality. It empowers you to create a truly restorative kitchen staple.
When to Use Bone Broth
Bone broth is incredibly versatile and can be seamlessly incorporated into your daily routine in numerous beneficial ways. It serves as a superior, nutrient-dense base for hearty soups, stews, and risottos, adding a rich, savory depth that plain water or regular stock simply cannot match. It is also excellent for deglazing pans after searing meat, creating instant, flavorful pan sauces. Beyond cooking, many people enjoy sipping warm bone broth on its own as a comforting, restorative beverage, especially during colder months or when seeking gentle digestive support and hydration.
Soups and Stews
Use as a nutrient-dense, collagen-rich base to significantly elevate the overall flavor and health benefits of your favorite comforting, hearty dishes.
Pan Sauces
Deglaze seared meats with bone broth to create rich, savory pan sauces that maximize flavor and minimize kitchen waste effectively.
Daily Wellness Drink
Sip warm bone broth on its own to actively support gut health, boost immunity, and provide a soothing, mineral-rich beverage daily.
Cooking Grains
Substitute water with bone broth when cooking rice or quinoa to infuse the grains with deep, savory flavor and extra protein.
The Bone Broth Technique
The core of making exceptional bone broth lies in the careful combination of high-quality ingredients, an acidic medium, and prolonged, gentle heat. Starting with fresh, preferably organic or grass-fed bones ensures a clean, robust flavor and maximum nutrient density from the very beginning. Adding a splash of apple cider vinegar is a critical, non-negotiable step, as the mild acidity helps actively draw out the essential minerals and collagen from the bones and connective tissues during the long simmering process. The absolute key principle is maintaining a very low, gentle simmer rather than a rolling boil. A vigorous boil will emulsify the fat and make the broth cloudy and bitter, while a gentle simmer extracts the gelatin cleanly, resulting in a clear, rich, and deeply nourishing final product that is perfect for daily consumption and culinary excellence in your kitchen.
The foundation of great bone broth relies on three main principles: quality of bones, the addition of acid, and low, slow heat. Using fresh, high-quality bones, ideally with some meat and connective tissue attached, provides the absolute best flavor and gelatin yield. The acidic environment, typically created by adding apple cider vinegar, is essential for breaking down the dense bone matrix and extracting vital minerals like calcium and magnesium. Finally, maintaining a gentle simmer over 12 to 24 hours ensures that the collagen fully converts to gelatin without making the broth cloudy or bitter, resulting in a clear, nutrient-dense liquid.
Step-by-Step Bone Broth Guide
Follow these detailed, easy-to-follow steps to create a rich, collagen-rich bone broth right in your own kitchen. Each specific step is carefully designed to maximize flavor extraction and nutritional value, ensuring a superior final product that easily surpasses any store-bought alternative. By taking the time to properly prepare the bones, roast them for depth, and maintain a gentle simmer, you will unlock the full potential of this restorative liquid. This methodical approach guarantees a clear, deeply flavorful broth that will become a staple in your healthy cooking routine.
Select and Prepare the Bones
Choose high-quality beef bones, such as marrow bones, knuckles, or oxtail. For the best flavor and gelatin yield, a mix of meaty bones and joint bones is ideal.
Tip: Ask your butcher to cut the bones into smaller pieces to expose more marrow and surface area for extraction.Roast the Bones
Place the bones on a baking sheet and roast them in the oven at 400 degrees Fahrenheit for about 30 to 45 minutes until they are deeply browned.
Tip: Roasting develops a deep, rich, savory flavor through the Maillard reaction, which is essential for a flavorful broth.Add Acid and Water
Transfer the roasted bones to a large stockpot or slow cooker. Add enough cold, filtered water to cover the bones by about two inches, and add two tablespoons of apple cider vinegar.
Tip: Let the mixture sit for 30 minutes before heating to allow the vinegar to begin drawing minerals from the bones.Add Aromatics
Add roughly chopped onions, carrots, celery, garlic, bay leaves, and whole peppercorns to the pot. Avoid adding salt at this stage.
Tip: Leaving the vegetable skins on can add a beautiful golden color to your final broth.Simmer Gently
Bring the pot to a bare simmer over medium heat, then immediately reduce the heat to low. The surface should barely ripple. Cover partially and let it simmer for 12 to 24 hours.
Tip: Check the water level every few hours and add more hot water if the bones become exposed.Strain and Cool
Remove the pot from the heat and carefully strain the broth through a fine-mesh sieve into a large bowl, discarding the solids. Allow it to cool to room temperature.
Tip: For a clearer broth, avoid pressing on the solids when straining; let it drain naturally.Store Properly
Once cooled, the fat will rise and solidify on top, acting as a natural preservative. You can leave this fat layer on until you are ready to use the broth.
Tip: Store the broth in airtight containers in the refrigerator for up to 5 days, or freeze it in portions for up to 6 months.Common Bone Broth Mistakes
Even experienced home cooks can make critical errors when making bone broth from scratch. Avoiding these common pitfalls will ensure your broth is perfectly clear, deeply flavorful, and maximally nutritious, rather than ending up cloudy, greasy, or unpleasantly bitter. Paying close attention to heat levels, preparation steps, and seasoning timing is essential for achieving the best possible results. By understanding why these mistakes happen, you can easily adjust your technique and consistently produce a restaurant-quality, restorative liquid that truly honors the quality of the bones you started with.
Boiling Instead of Simmering
Why It Happens: Leaving the heat too high in an attempt to speed up the long cooking process.
How to Avoid: Maintain a very low, gentle simmer where only a few bubbles occasionally break the surface.
Skipping the Roasting Step
Why It Happens: Trying to save time or incorrectly assuming raw bones will yield the same rich flavor.
How to Avoid: Always roast the bones first to develop a deep, rich, savory flavor profile.
Adding Salt Too Early
Why It Happens: Seasoning the broth at the very beginning of the long cooking process.
How to Avoid: Wait until the broth is fully reduced and strained before adding any salt, as the flavor concentrates over time.
Pro Tips for Perfect Bone Broth
Elevate your homemade bone broth from merely good to truly exceptional with these expert culinary techniques. These small, deliberate adjustments can significantly enhance the overall clarity, depth of flavor, and nutritional density of your final product. Implementing these professional tips will help you avoid common pitfalls and ensure that every batch you make is of the highest possible quality. By paying attention to these details, you transform a simple kitchen task into a refined practice that yields a superior, restorative elixir for your family.
A slow cooker provides consistent, low heat without the risk of boiling, making it the most foolproof method for a 24-hour simmer.
Briefly boiling raw bones for 10 minutes and discarding that water before roasting removes impurities, resulting in a remarkably clear, pristine broth.
Keep a dedicated bag in your freezer for onion skins, carrot tops, and celery ends to add free, flavorful aromatics to your next batch of broth.
Stir in fresh parsley or thyme during the last 30 minutes of cooking to add a bright, fresh layer of flavor.
Practice Exercises
Master the art of bone broth by actively practicing these focused, hands-on exercises. They will help you refine your technique, build confidence, and develop a keen intuition for achieving the perfect texture and flavor every single time. By deliberately paying attention to the visual and aromatic cues during the cooking process, you will learn to recognize the signs of a successful extraction. These practical exercises are designed to transform you from a novice follower of recipes into a confident creator of restorative, high-quality bone broth in your own kitchen.
The Gelatin Test
After chilling your broth overnight, check if it has turned into a firm jelly. This indicates a successful, high-collagen extraction and proper technique.
Flavor Adjustment
Practice seasoning a small cup of finished broth with salt, pepper, and a splash of lemon juice to understand how to perfectly balance the rich, savory flavors.
Visual Clarity Check
Observe the broth as it simmers. Practice adjusting the heat to maintain a barely-there ripple, ensuring the fat does not emulsify and cloud the liquid.
يقول
Culinary professionals consistently emphasize that patience and ingredient quality are the true, non-negotiable secrets to exceptional bone broth. The long simmering time is not just a mere suggestion; it is a biological necessity for extracting the maximum amount of collagen and minerals from the bones. Rushing the process with high heat will only compromise the clarity and nutritional value of the final product. True mastery lies in respecting the ingredients and allowing the gentle heat to work its magic over many hours, resulting in a deeply restorative liquid.
"The magic of bone broth happens in the final hours of simmering. That is when the collagen fully converts to gelatin, giving the broth its signature richness and health benefits. Never rush the process."
Culinary Instructor
Key Takeaways
Remember these essential, foundational points to consistently produce high-quality, nutrient-dense bone broth at home. Mastering these fundamental techniques will not only transform your everyday cooking but also actively support your overall health and wellness. By focusing on the quality of your bones, the importance of the acidic medium, and the necessity of a gentle, prolonged simmer, you can reliably create a superior product. These key takeaways will serve as your guide to unlocking the full restorative potential of this classic, time-honored culinary tradition in your own kitchen.
Bottom Line
Making bone broth at home is a simple, highly rewarding process that yields a powerful, nutrient-dense foundation for all your cooking. By focusing on high-quality ingredients and patient, low-heat simmering, you can create a superior product that actively supports your health. This technique transforms simple bones into a restorative elixir, elevating your culinary creations and investing in your long-term wellness.
Mastering the art of bone broth transforms simple, high-quality bones into a restorative, collagen-rich elixir that nourishes the body. By committing to the slow simmer and using the absolute best ingredients, you elevate your culinary creations and deeply invest in your long-term health. Start your next batch this week and experience the profound difference that true, slow-extracted bone broth makes in your kitchen and your overall well-being.
What to Learn Next
Once you have confidently mastered the basics of bone broth, you can easily expand your culinary skills by exploring these related, complementary techniques. Each of these suggestions builds directly upon the foundation of slow cooking and deep flavor extraction that you have already established. By continuing to practice and refine these methods, you will elevate your everyday meals into nourishing, restaurant-quality experiences that truly honor the quality of the ingredients you use.
How to Make Beef Soup
Learn how to use your homemade bone broth as the ultimate, nutrient-dense base for a hearty, comforting, and deeply flavorful beef soup.
Quick Beef Stir-Fry Recipe
Discover how to quickly prepare tender beef for a fast, flavorful weeknight meal using the right cuts and high-heat cooking techniques.
How to Make Biftek
Master the classic Egyptian Biftek recipe, a perfect, flavorful way to utilize high-quality, tender cuts of beef right in your own home kitchen.